Page 1 of 2

How to extend / shorten switchblock wiring

Posted: Mon Feb 21, 2022 4:12 pm
by hillsy
I was looking at an old post of mine from another forum and thought it might be useful on here. Hoping you all can see the PhotoBucket images - I don't have them on my computer anymore and to be honest I'm kinda surprised I can still see them:


This method can be used for lengthening or shortening the wiring going to your switchblocks. For ease of posting, I’ve chosen to shorten this one. If you are lengthening yours (like for a streetfighter bar conversion), then you pretty much do the same thing except adding a piece of wire in the middle (duh) and having 2 solder joins per wire instead of one. You can either add some extra outer sheathing, buy a new length, or use heatshrink.

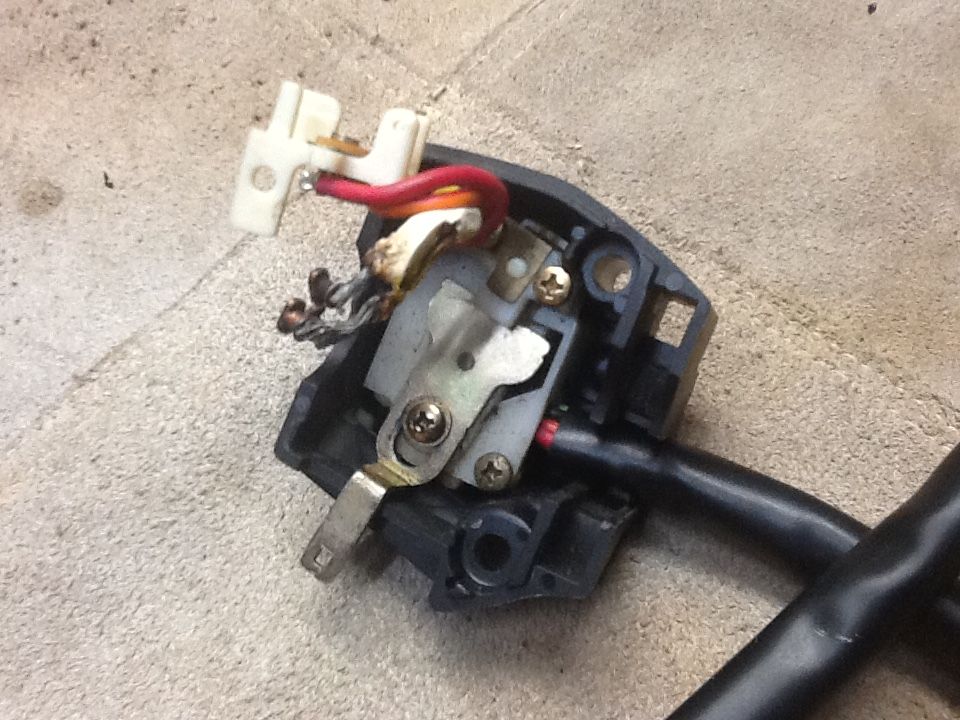
We are going to re-use the pins and the connector block in this exercise. You could go all full retard and buy something like fancy Deutsch connectors and think you’re improving things but if you actually look inside your switchblock and see how the switches work, well, fancy connectors in this application would be like putting racing slicks on a warehouse hand trolley. Also, changing the connectors means if you ever have to buy another switchblock (like if you slide down the road and FUBAR this one) you have eliminated the plug and play aspect and are in for another night with the soldering iron / crimpers.

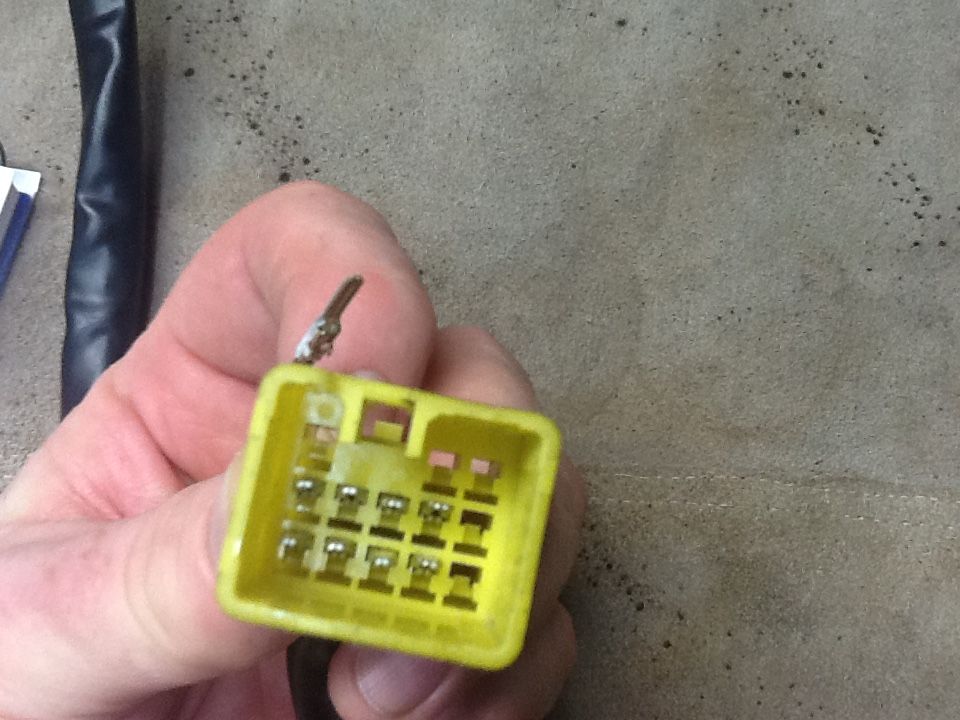
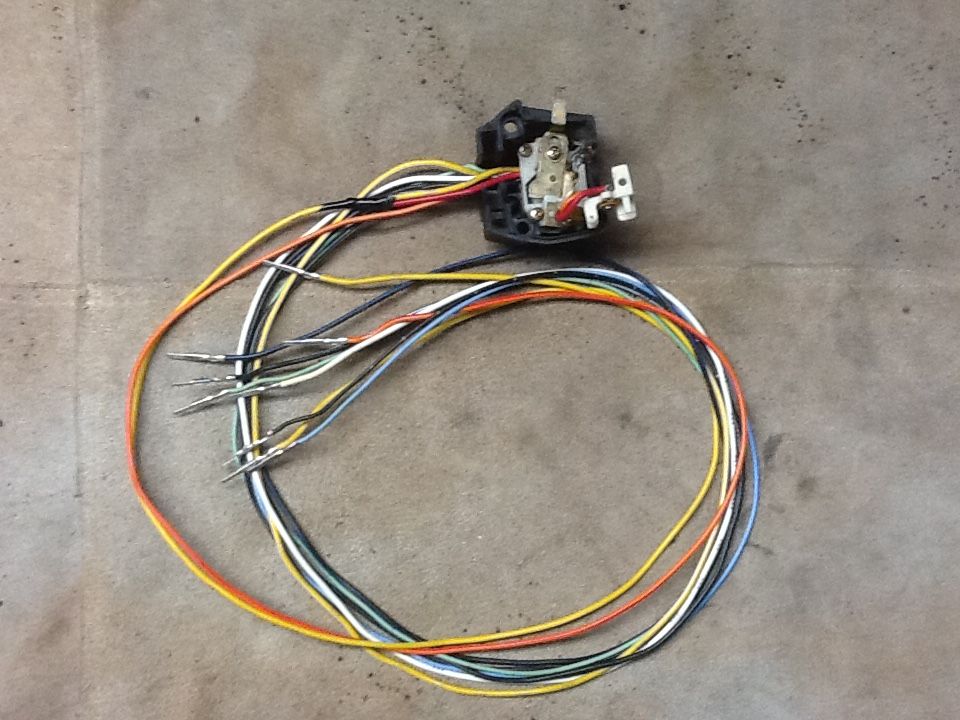
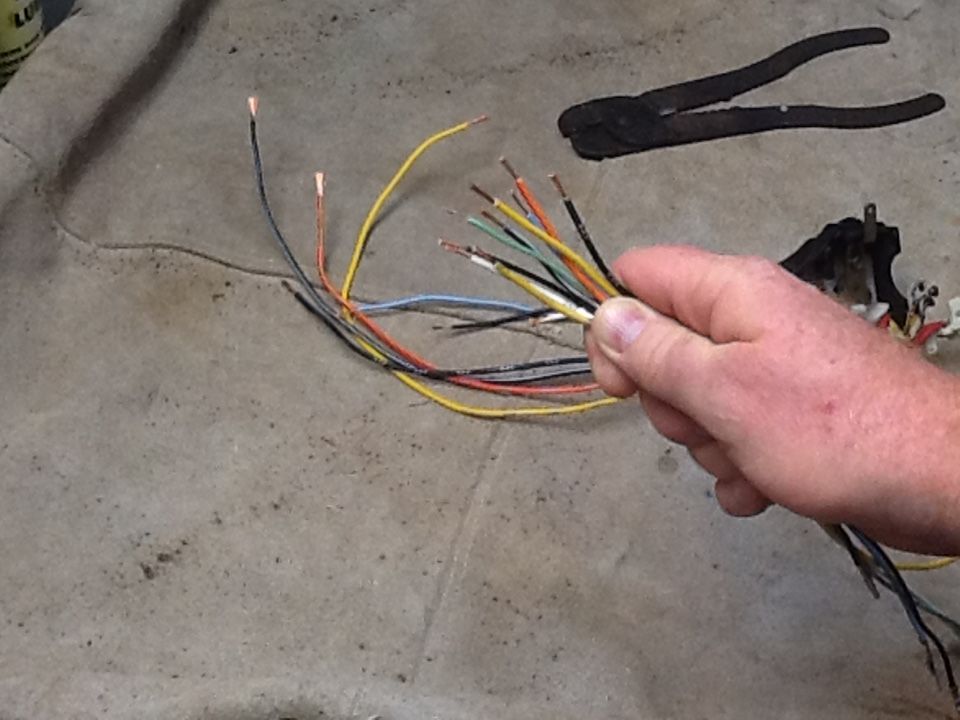
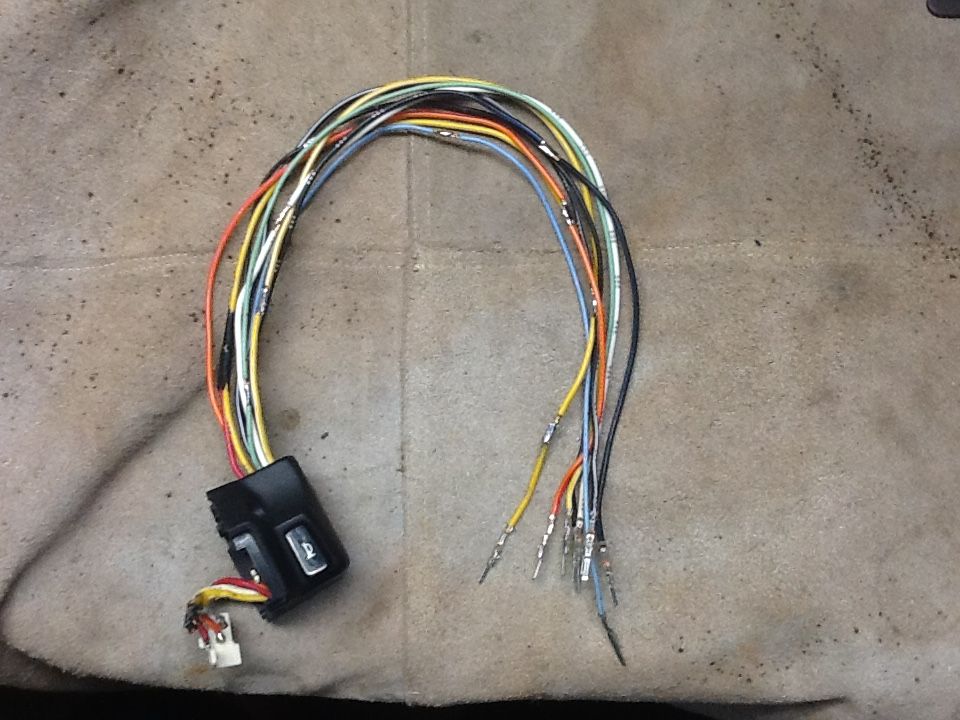
This switch block is off a GSXR750 from early 2000 vintage. It’s just one I found in the pile of crap in my garage. It’s got 9 wires . Most switchblocks from “vintage” bikes will have between 5 and 7 wires. This principle works with pretty much any switchblock anyway:
Image


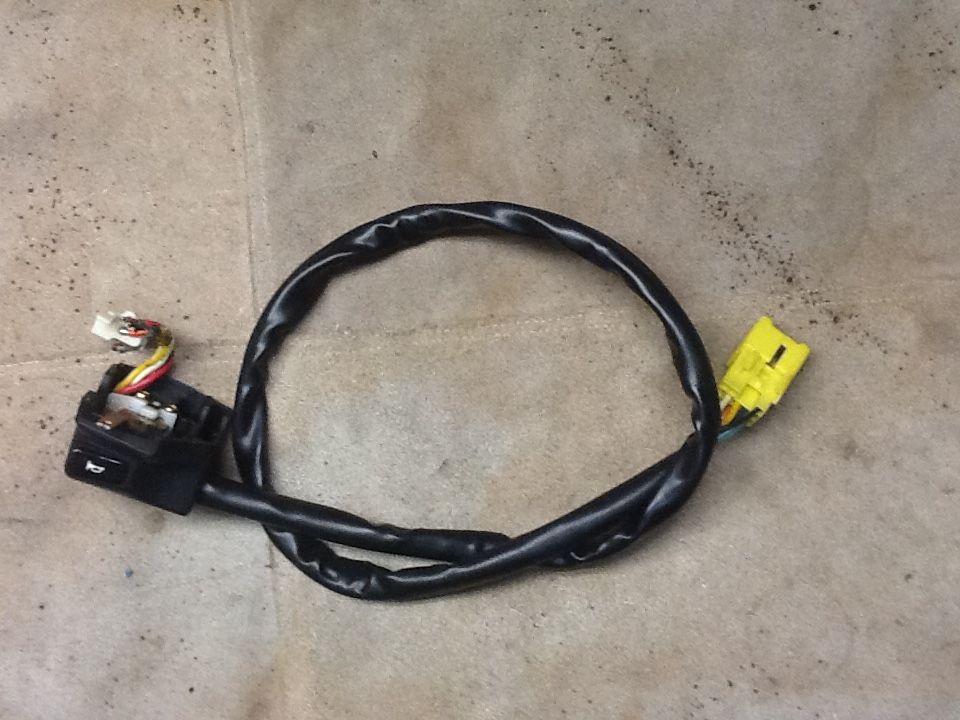
As you can see, this one has had some issues in the past, but never mind....
Image


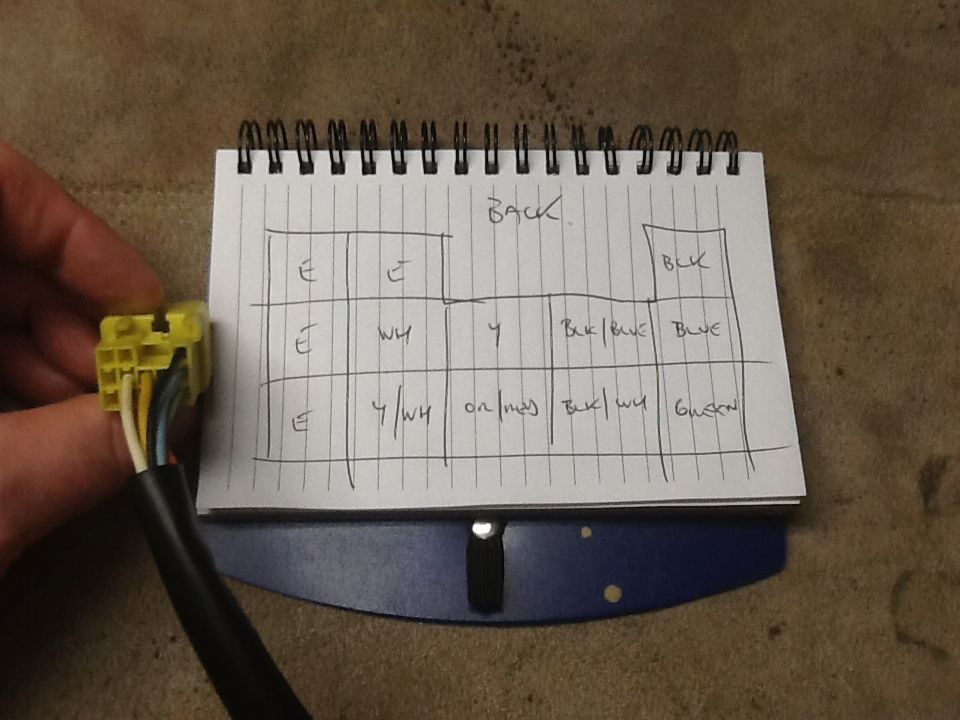
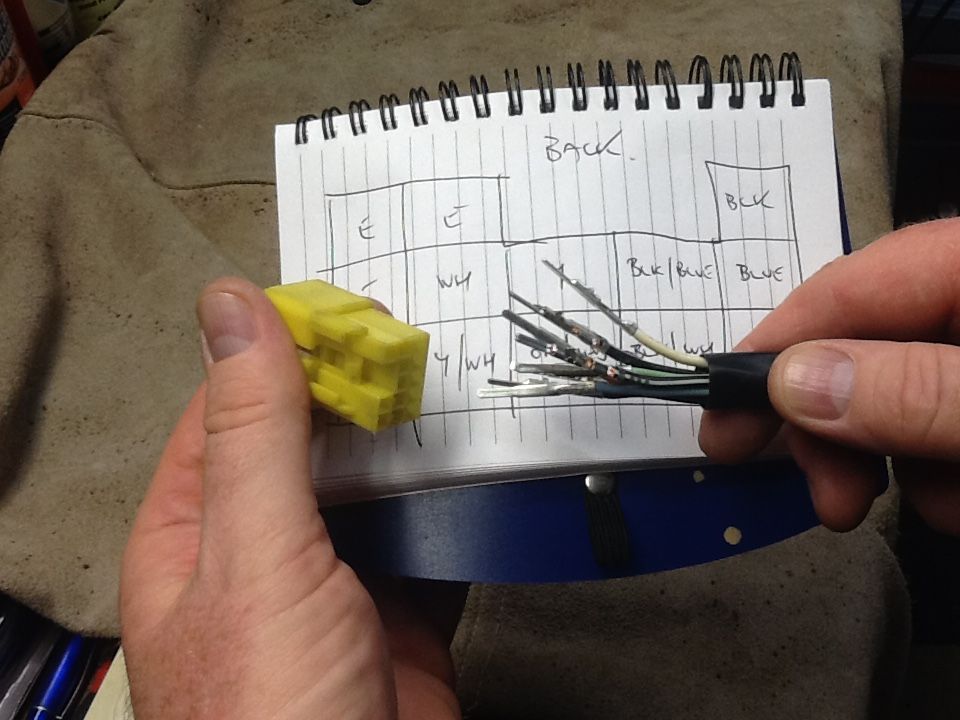
First up, draw a diagram of the connector block so you know where the wires go back in. If by chance you have 2 wires the same colour (pretty unlikely) you’ll have to mark one of them and the connector to know where it goes:
Image


Then, using a suitable tool, push back the retaining pins and pull out the terminals (these little hobby screwdrivers work quite well)
Image


Image


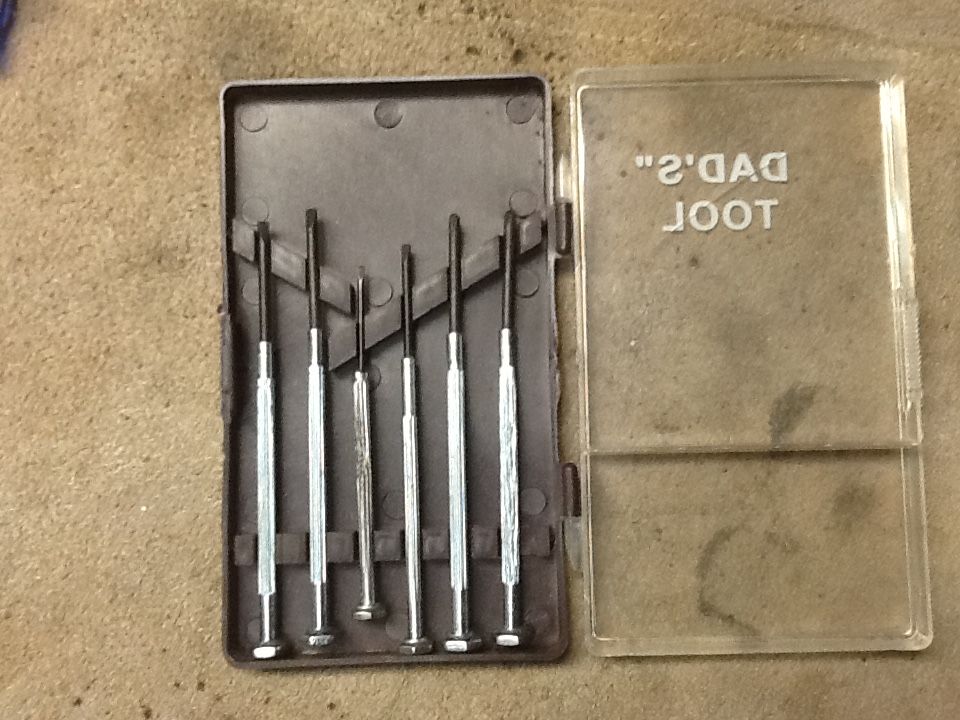
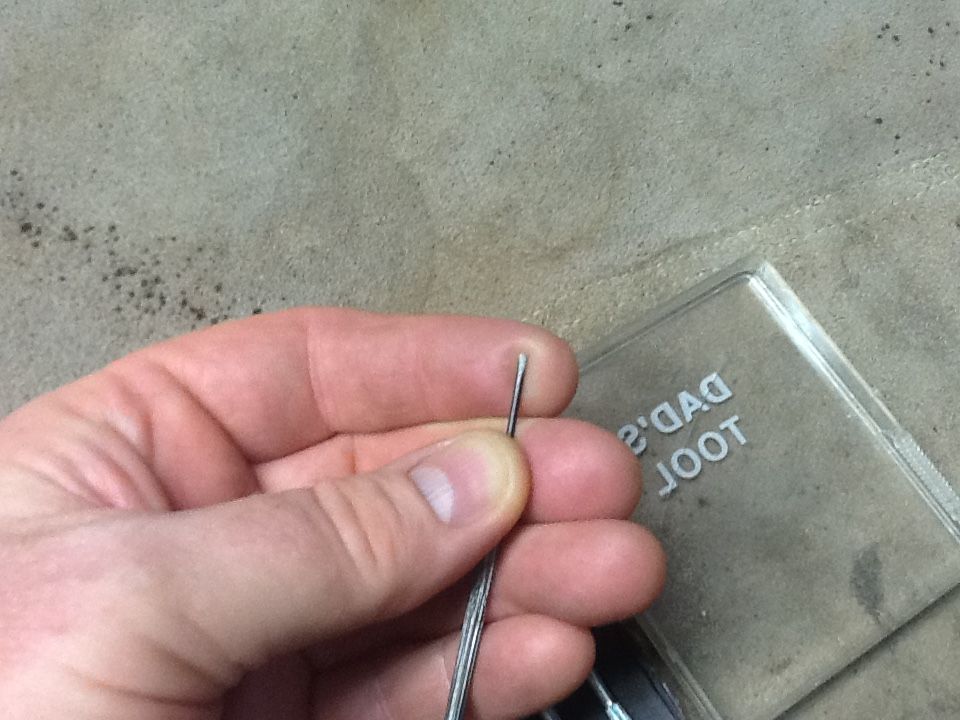
Some terminals have a locking tab built into the pins that you have to press back to extract it from the block, this one has the retaining tabs in the plastic of the block, so it's a bit easier to get the pins out.
Image


Image


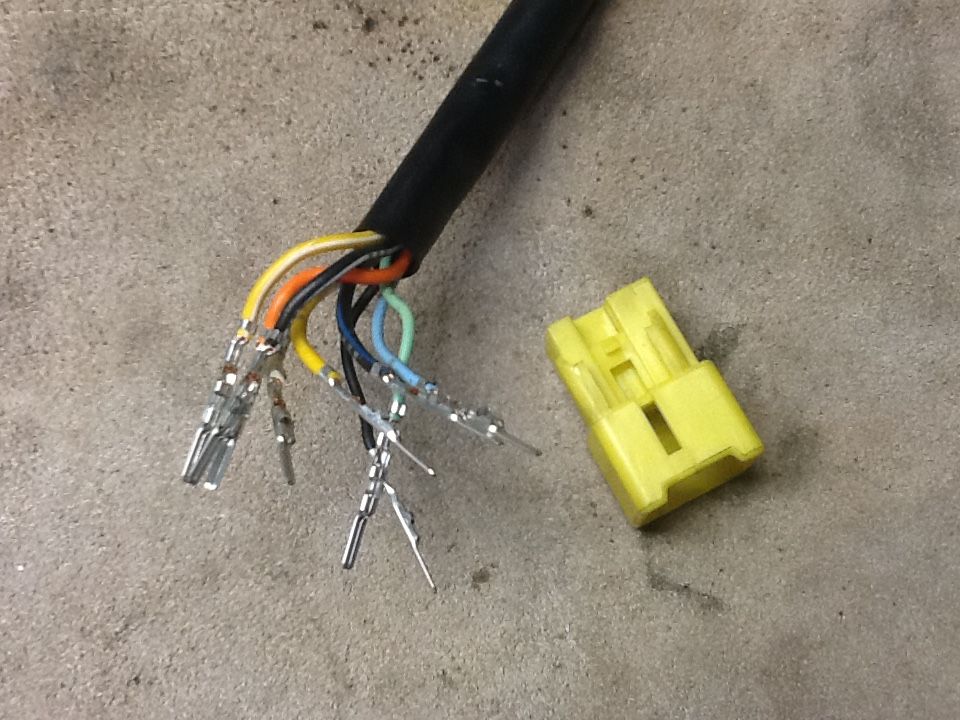
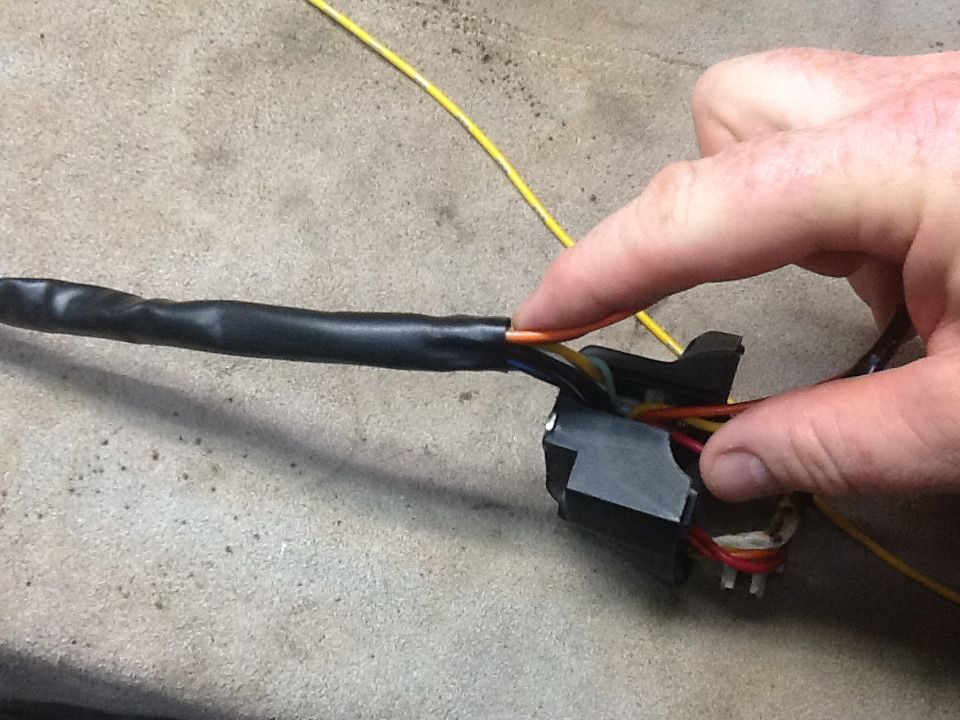
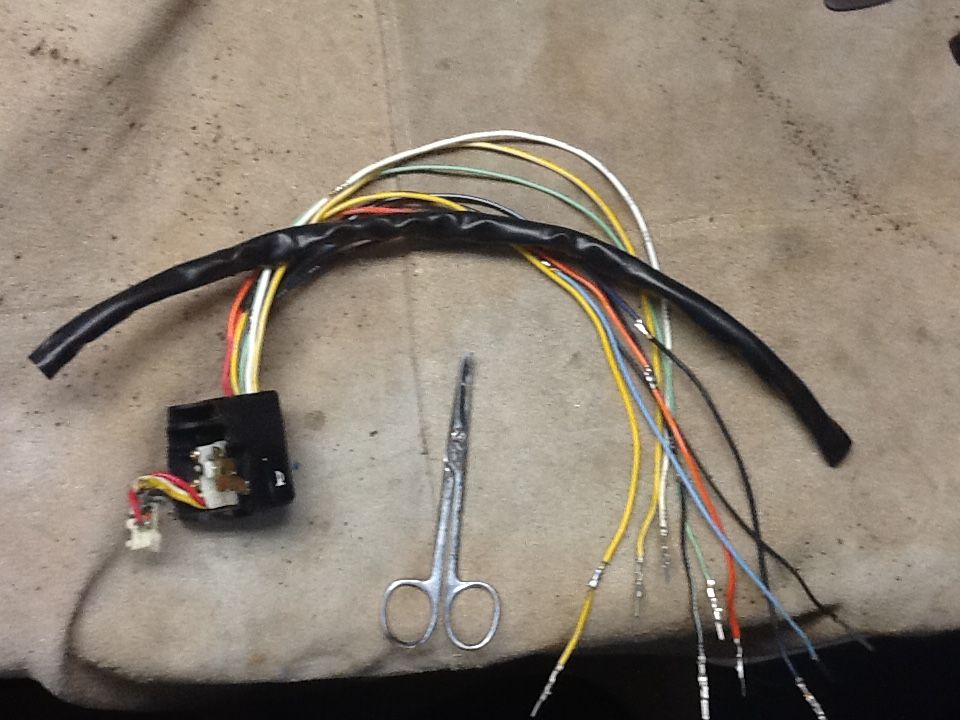
Now, slide the sheathing off the wires. If you can’t do this in one go because of the bulk of the terminals you might need to pull a few out at a time:
Image


Image


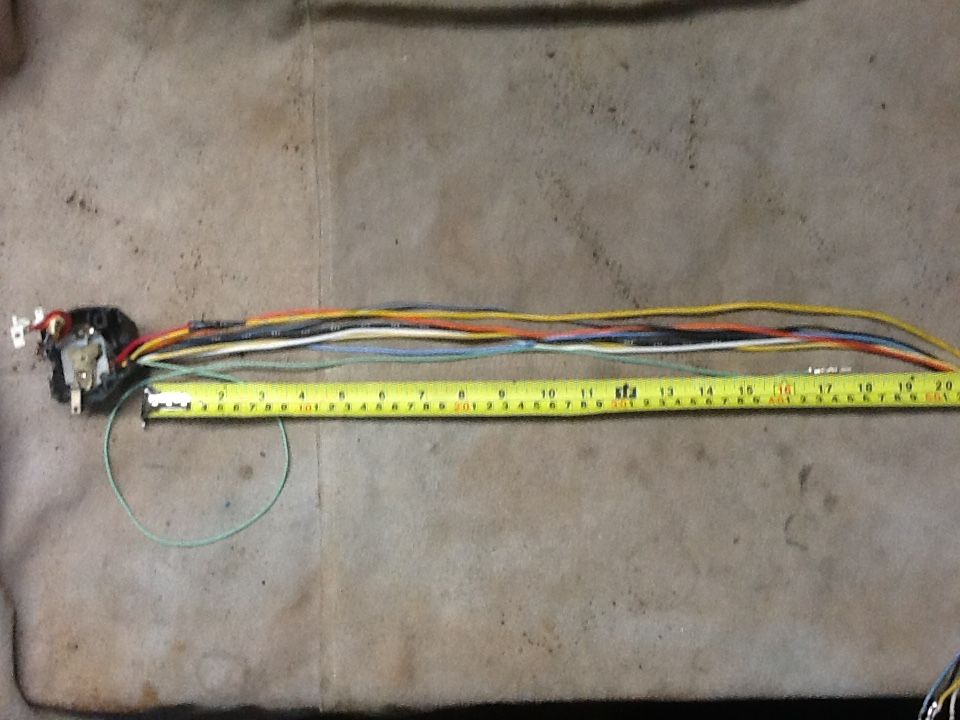
Work out how much wire you want to take out:
Image


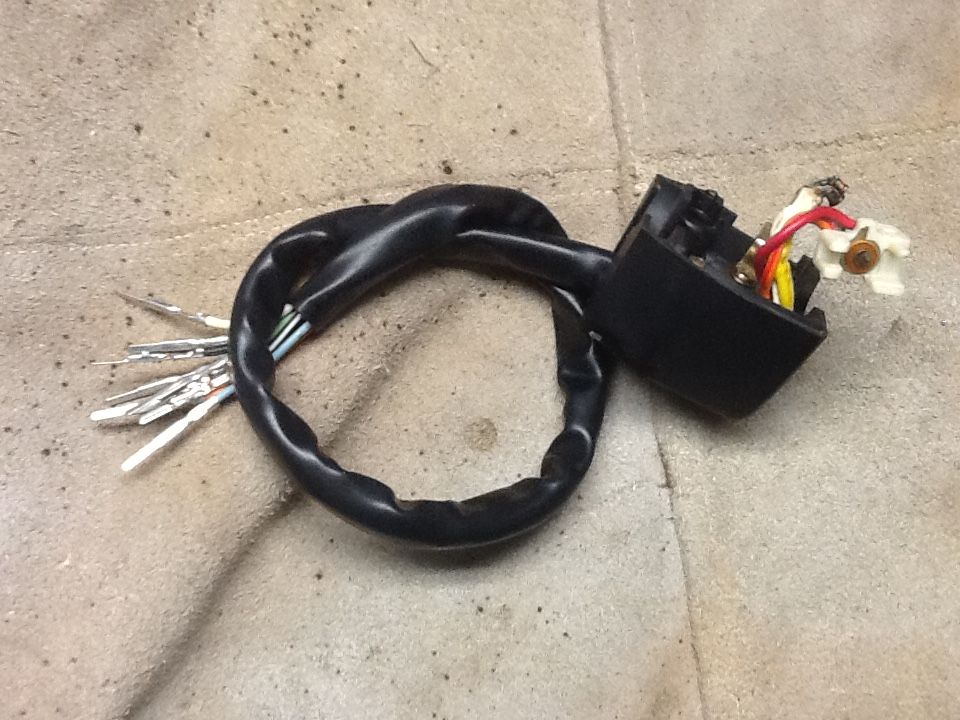
Cut the first wire up near the switchblock end and keep the bit you’ve removed:
Image


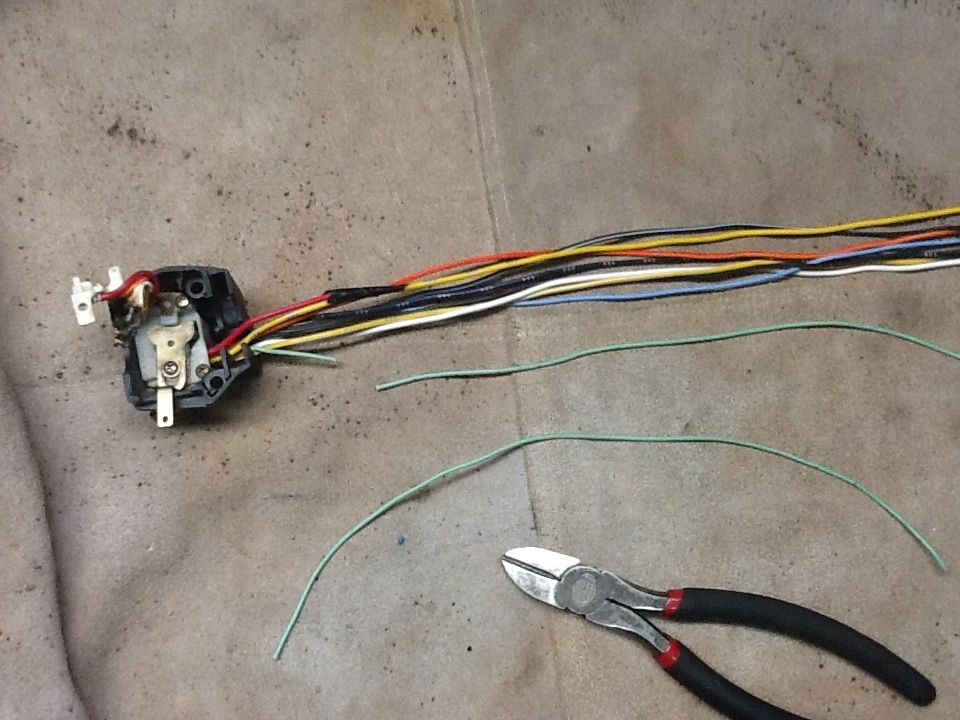
Stagger the cuts along the length of the harness. If you do this correctly / have enough room you can re-join the wires and not need to individually insulate them. If you have 2 wires the same colour it’s a good idea to do one at the start and the other at the end so you can be sure you don’t mix them up. Use the piece you removed from the first wire cut as a template for shortening the rest of the harness.
Image


Strip about 1cm or 3/8” off each end of the wires:
Image


Image


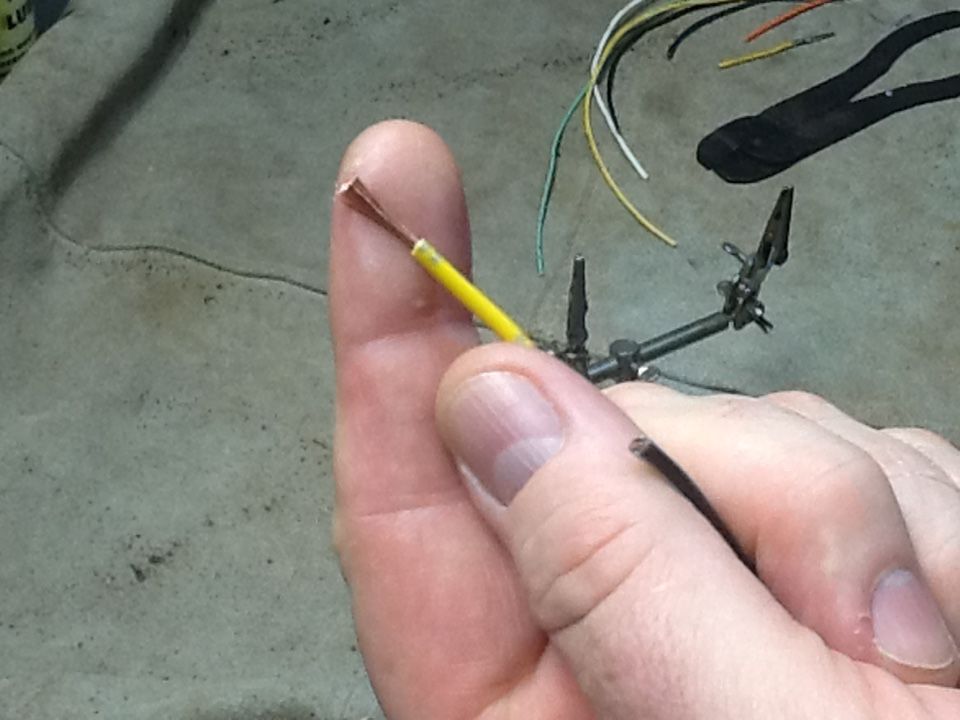
If you are using individual heat shrink to insulate each wire, PUT THEM ON NOW. You will forget at some stage and you usually only remember when the soldering iron is turned off and cold.
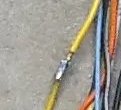
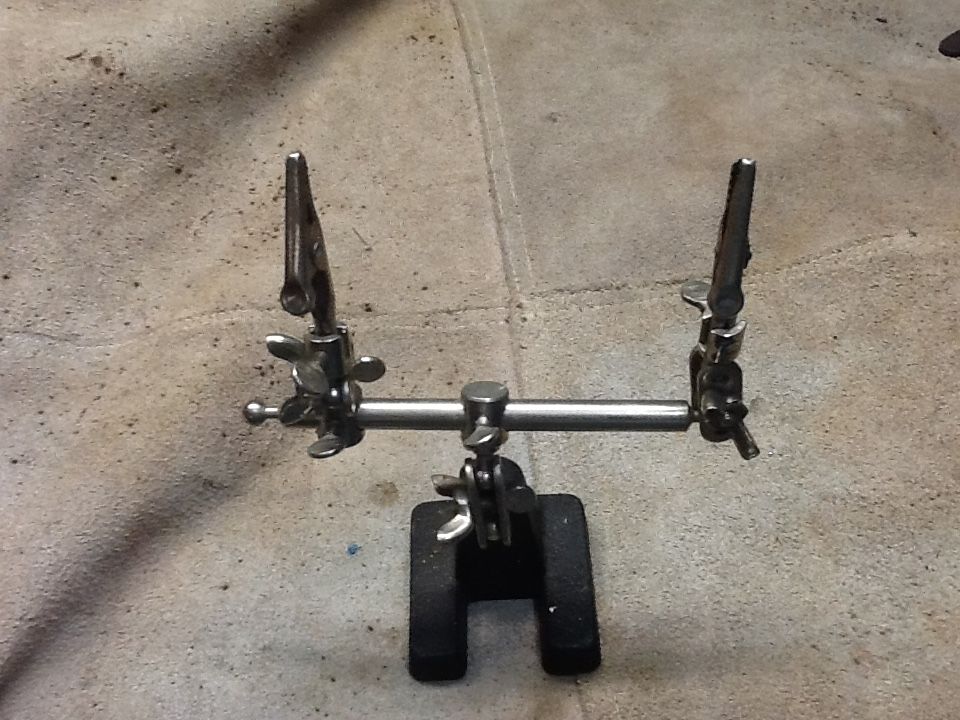
Solder up the wires. These things are really handy...
Image


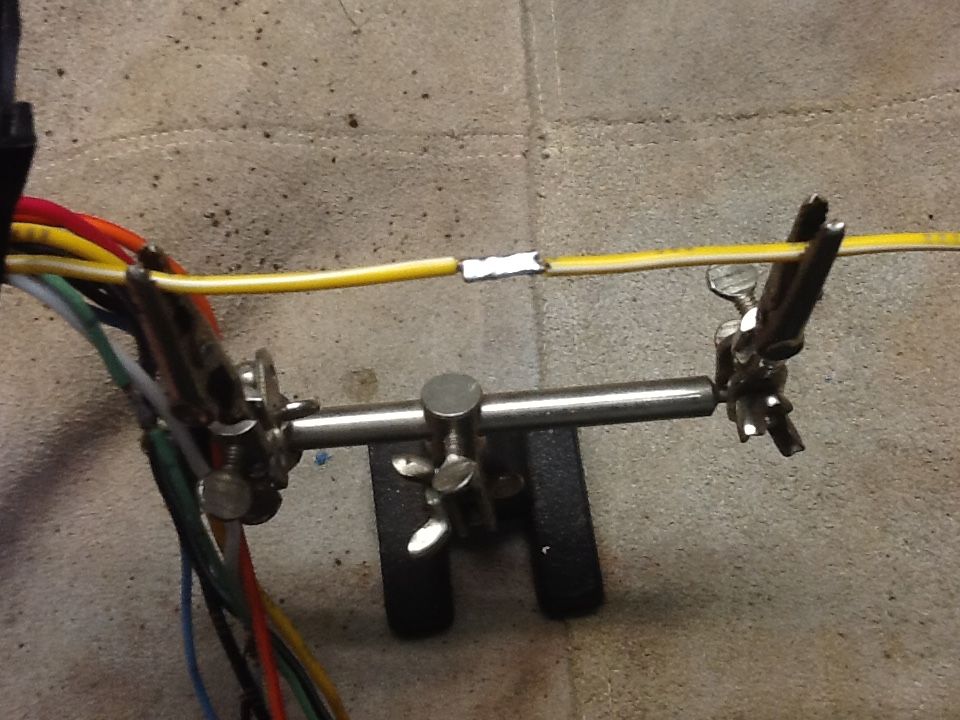
You can do this either by individually tinning the ends and then soldering them together side by side, or just pushing the bare wires into each other and soldering them in situ. Either way works — the latter is probably neater / less intrusive if you are using heatshrink for the outside of the wiring instead of sheathing......but I prefer tinning the individual leads and then soldering them together as I feel this ensures the solder flows into the wires better:
Image


Image


Trim the sheathing / heatshrink to the new length and slide it back on:
Image


Image


Put all the terminals back in as per your diagram.
Image


Image


Job done — drink beer :D

Re: How to extend / shorten switchblock wiring

Posted: Mon Feb 21, 2022 4:23 pm
by sgtcall
:ShitGrinandThumb:

Thanks for posting.

Re: How to extend / shorten switchblock wiring

Posted: Mon Feb 21, 2022 6:04 pm
by navigator
:ShitGrinandThumb: :ShitGrinandThumb:

Re: How to extend / shorten switchblock wiring

Posted: Tue Feb 22, 2022 7:45 am
by Designer
When I made a Custom Lowered Seat on Black Thunder, I moved all the Relays/Flasher, etc. to a Custom Battery Box, and the Ignitor to it's own waterproof box, by rewiring the entire Harness, I used this same Splicing Method to lengthen the wires using the same-colored wire from a used Wiring Harness.

Wouldn't it improve things to have used Heat Shrink over all those New Soldered Connections ? Seems like Cheap insurance to me.

Re: How to extend / shorten switchblock wiring

Posted: Tue Feb 22, 2022 2:07 pm
by hillsy
Designer wrote:
Tue Feb 22, 2022 7:45 am

Wouldn't it improve things to have used Heat Shrink over all those New Soldered Connections ? Seems like Cheap insurance to me.
My reasoning is in the post - if there is enough room along the length of the wires to stagger the joins far enough apart you don't need individual heatshrink. Of course if you are extending the cabling by adding a section you will have twice as many joins and will probably need to insulate some of them.

Re: How to extend / shorten switchblock wiring

Posted: Tue Feb 22, 2022 2:46 pm
by Designer
My experiences tell me to always Weather-proof/Insulate the soldered joints with Heat Shrink.

When I changed bars on my 1400 way back in 2003, I lengthened the wires doing exactly what your How-to showed. A few years later, when I was installing my Custom made Sport Bike Risers/Bars/Acewell Gauge I had to fit the Stock Wiring to my Joker Machine Levers/Switches.

When I cut into the Splices I had made, I noticed considerable corrosion had worked it's way back up under the Stock Wire's insulation at each joint.
Thus I saw the need to Weather-proof the joints,......... and Heat Shrink does that perfectly.

Like I said,...it is Cheap Insurance towards longevity.

Re: How to extend / shorten switchblock wiring

Posted: Tue Feb 22, 2022 3:15 pm
by hillsy
By all means put heat shrink on the individual joins if it makes you feel better.

Re: How to extend / shorten switchblock wiring

Posted: Tue Feb 22, 2022 3:22 pm
by Designer
Again with your Demeaning Ridicule when faced with facts that you don't..."like" .

my suggestion comes from real-life experience, makes complete sense..... and that seems to irritate you.

Re: How to extend / shorten switchblock wiring

Posted: Tue Feb 22, 2022 3:26 pm
by hillsy
Designer wrote:
Tue Feb 22, 2022 3:22 pm
Again with your Demeaning Ridicule when faced with facts that you don't..."like" .

my suggestion comes from real-life experience, makes complete sense..... and that seems to irritate you.
Nope - not irritated - just SMH.

Have you ever opened up a wiring harness and seen soldered joins without any heatshrink or tape around them? Like from the factory??

Obviously not.... :ShitGrinandThumb:

Re: How to extend / shorten switchblock wiring

Posted: Tue Feb 22, 2022 4:37 pm
by Designer
hillsy wrote:
Tue Feb 22, 2022 3:26 pm
Designer wrote:
Tue Feb 22, 2022 3:22 pm
Again with your Demeaning Ridicule when faced with facts that you don't..."like" .my suggestion comes from real-life experience, makes complete sense..... and that seems to irritate you.
Nope - not irritated - just SMH. Have you ever opened up a wiring harness and seen soldered joins without any heatshrink or tape around them? Like from the factory?? Obviously not...
Yes, I have seen those joints you mention from the factory..... even before you have. And have seen similar corrosion/oxidation, but less
And,....You are irritated enough by what I suggest,.....enough to try to demean my suggestion of using heat shrink.
And here's where you fail...you even suggested to use heat shrink yourself!
hillsy wrote:
Mon Feb 21, 2022 4:12 pm
......... You can either add some extra outer sheathing, buy a new length, or use heatshrink.

:Cool:

Re: How to extend / shorten switchblock wiring

Posted: Tue Feb 22, 2022 5:32 pm
by hillsy
:funnylast: Idiot follows me everywhere :lmao:

BTW - I'm calling BULLSHIT on "I lengthened the wires doing exactly what your How-to showed".

Why? Because you're full of shit :hahafinger:

Re: How to extend / shorten switchblock wiring

Posted: Wed Feb 23, 2022 5:55 am
by Designer
Best that we ignore the angry Board Member above. :uhh:

My making the suggestion of using Heat Shrink on the soldered joints comes from experience living in a Climate that Regularly has Rain Storm possibilities for 9-10 months a year,....along with the accompanying Higher Humidity. Unlike living in a Semi-arid climate, the corrosion from all that moisture getting under the melted/burnt insulation is not your friend, and over time can make for Headaches. I've seen it in my own work.

As I politely suggested,....it is 'cheap insurance' to put Heat Shrink on those joints.

It's even recommended by the OP.

Ride Safe and Long!

Re: How to extend / shorten switchblock wiring

Posted: Wed Feb 23, 2022 3:28 pm
by hillsy
Designer wrote:
Wed Feb 23, 2022 5:55 am
Best that we ignore the angry Board Member above. :uhh:

My making the suggestion of using Heat Shrink on the soldered joints comes from experience living in a Climate that Regularly has Rain Storm possibilities for 9-10 months a year,....along with the accompanying Higher Humidity. Unlike living in a Semi-arid climate, the corrosion from all that moisture getting under the melted/burnt insulation is not your friend, and over time can make for Headaches. I've seen it in my own work.

As I politely suggested,....it is 'cheap insurance' to put Heat Shrink on those joints.

It's even recommended by the OP.

Ride Safe and Long!
I've been doing these sorts of extensions / shortening for over 20 years. Never seen a soldered joint that I have done corrode like you've "experienced". Do you ride your bikes underwater? Maybe you aren't re-sheathing the wires properly? Or maybe your soldering skills need reviewing? I probably should add here I was working for a small telecommunications about 30 years ago where I was assembling office phone / PABX systems and was on the soldering iron for pretty much half my working day building circuit boards and wiring harnesses. I probably have better soldering skills than most.

The other thing people will say is "you shouldn't use soldered joints because the vibrations can crack the joins" - which is good advice if you are joining a lead to a FIXED or SOLID point (like a frame mounted terminal) - but in this situation both ends of the wire are NOT fixed and therefore don't suffer from that sort of vibration stress.

BTW - I said you can use heatshrink INSTEAD of the outer sheathing - in case you have extended the loom and are unable to find longer sheathing.

But in the end you are probably right in saying you should use heat shrink on each join - this will help the join integrity if your soldering skills are sub-par.

Re: How to extend / shorten switchblock wiring

Posted: Wed Feb 23, 2022 6:47 pm
by Designer
Sad that hillsy resorts to personal attack of my Soldering Skills, Name Calling and makes Ignorant & Insulting Comments like ..."underwater".
None of which helps anyone make wise choices for Wiring,...does it!

Seems he doesn't "like it" when others add their Experience to his Threads.

I found the Climate makes a difference. And his climate experiences are limited,...to that in Australia are not the same as others in America and beyond. And as I suggested,....it is cheap insurance to weatherproof the Joints,....why would anyone find that a Threat to their instructions on soldering?

Re: How to extend / shorten switchblock wiring

Posted: Wed Feb 23, 2022 7:07 pm
by hillsy
See - this is what is telling me you are not soldering correctly:
Designer wrote:
Wed Feb 23, 2022 5:55 am
the corrosion from all that moisture getting under the melted/burnt insulation is not your friend
You should not end up with melted or burnt wire insulation if you are soldering correctly with an appropriate iron (correct tip, temperature) and the correct solder / flux ratio. And it is by far easier to get this right if you flow the solder into each wire end then join them after they have been tinned.

Anyway - the reality beyond all of this is that the terminals inside the switchblocks are all soldered, unprotected and "exposed" far more than any joins you would put along the wires covered with the sheathing.

So if your soldering is up to par - and it's the climate that is the only culprit - then you must have a hell of a time with continued failing switchblocks in your part of the world..... :dunno:

Re: How to extend / shorten switchblock wiring

Posted: Thu Feb 24, 2022 7:43 am
by Designer
hillsy wrote:
Wed Feb 23, 2022 7:07 pm
See - this is what is telling me you are not soldering correctly:
You should not end up with melted or burnt wire insulation if you are soldering correctly ......
So if your soldering is up to par -
I see,..so you say I should be soldering correctly,...the way you do...the way that doesn't get any burnt/melted insulation,....Like this is?

Image

Re: How to extend / shorten switchblock wiring

Posted: Thu Feb 24, 2022 1:49 pm
by hillsy
Dude - I have no idea what you think you are seeing in a blown up image of a shit photo from about 8 years ago taken on an old iPad in a poorly lit room and now fucked over by PhotoBucket - but the insulation is not melted or burnt. There looks to be flux on there - maybe you're confusing that with melted insulation.

So how many times are you changing out the wiring in your switchblocks? You say the elements play havoc with your joins so they MUST be doing the same with the unprotected terminals inside the switchblock bodies, right? Or are you just speaking shit again?

Re: How to extend / shorten switchblock wiring

Posted: Thu Feb 24, 2022 2:22 pm
by Designer
hillsy wrote:
Thu Feb 24, 2022 1:49 pm
Dude - I have no idea what you think you are seeing in a blown up image of a shit photo from about 8 years ago taken on an old iPad in a poorly lit room and now fucked over by PhotoBucket - but the insulation is not melted or burnt. There looks to be flux on there - maybe you're confusing that with melted insulation.
Dude,...we are all looking a Burnt/discolored insulation at both ends,.... more at one than the other.
You can see it right there
Image


So don't EVEN THINK you can bullshit your way out of THAT.

We all have just seen that you are a Pathological Liar.
viewtopic.php?f=8&t=13458&start=376

Re: How to extend / shorten switchblock wiring

Posted: Thu Feb 24, 2022 2:39 pm
by hillsy
Springy - fucking give up dude. I've already said you can put heatshrink on all the joins if it makes you sleep better at night but they don't need it if they are staggered properly. The whole thing is STILL inside the sheathing.

Your musing about corrosion is all good and well but it's kinda moot because the terminals inside the switchblocks are exposed anyway. If corrosion is going to affect the wiring ANYWHERE it's going to be there first and foremost.

Re: How to extend / shorten switchblock wiring

Posted: Thu Feb 24, 2022 2:48 pm
by Designer
hillsy wrote:
Thu Feb 24, 2022 2:39 pm
....Your musing about corrosion is all good and well but it's kinda moot because the terminals inside the switchblocks are exposed anyway. If corrosion is going to affect the wiring ANYWHERE it's going to be there first and foremost.
No. again your a grasping at straws. You FAIL again to understand because of your limited knowledge of climate beyond your limited experience living in your Semi-arid climate. Best you learn more before making more mistakes. As I said,...the melted/ burnt Insulation at the soldered joints mid-wire is a bit more prone to corrosion that the Crimped-on terminals at the switch blocks inside the Switch covers.

Good that you finally have stopped trying to BS your way out of your "superior soldering abilities". :wink: